


How to Master Minecraft in 2024: A Complete Step-by-Step Guide for New and Returning Players
Minecraft has sold over 300 million copies worldwide and remains one of the most popular video games of all time, with a dedicated community that creates everything from tiny survival bases to fully functional computers inside the game. Whether you’re picking up the game for the first time after a decade-long break or just struggling to stop dying to creepers, this comprehensive guide will walk you through every core skill you need to thrive in both Survival and Creative modes. We’ll break the process down into logical, easy-to-follow stages so you can go from a confused new player to a confident builder, explorer, and survivor.
1. How to Get Started with Minecraft: First 30 Minutes of Gameplay
The first half-hour of a new Minecraft world is the most critical for setting yourself up for long-term success. Most new players get overwhelmed by the open world, but sticking to a simple, step-by-step routine will help you avoid common mistakes.
First, spawn in and take a quick look around: you’ll see trees, grass, dirt, and possibly water or lava pools. Your first task is to collect wood: punch a tree until it breaks into logs, then open your inventory to craft a crafting table and wooden tools. Without a crafting table, you can’t make most essential items, so this is your absolute first priority. Next, craft a wooden pickaxe to mine stone, which will let you make better tools, and a wooden shovel to dig dirt quickly for shelter.
Your next goal is to build a temporary shelter before night falls. Minecraft’s day-night cycle lasts 20 minutes, with 10 minutes of daylight and 10 minutes of dangerous nighttime mobs like zombies, skeletons, and creepers. A simple 3x3 dirt hut with a single torch inside will keep you safe for your first night. Don’t waste time building a fancy base right away: focus on staying alive long enough to gather more resources.
Once you’re safe inside, craft a furnace to smelt iron ore later, and cook any food you’ve foraged like wheat or meat. By the end of your first night, you should have a crafting table, wooden tools, a basic shelter, and at least one torch to light your surroundings. Most new players fail within their first night because they don’t build shelter fast enough, so don’t rush past this step.
2. How to Gather Core Resources Efficiently
Once you’ve survived your first night, you’ll need to start gathering the core resources that will let you expand your base and gear up. The most important resources fall into four categories: building materials, tools, combat gear, and renewable resources.
Start by expanding your wood supply: you’ll need hundreds of logs for building, crafting tools, and making charcoal. Next, mine stone to make stone tools, which are far more durable than wooden ones. Stone pickaxes can mine iron ore, which is the next tier of resource you’ll need for better armor and tools. You should also collect coal to fuel your furnaces, since coal will let you smelt iron, cook food, and make torches to light your base.
A common mistake new players make is ignoring renewable resources. Wheat can be planted and harvested to make bread, which is a reliable food source once you have a farm. Sheep can be sheared for wool to make beds, which let you skip the night safely without hiding inside a shelter. Cows and pigs can be bred for meat, which will keep your hunger bar full so you don’t start losing health when you’re exploring.
You should also start collecting obsidian once you have a diamond pickaxe, since obsidian is required to build a Nether Portal, the gateway to the game’s dangerous secondary dimension. Obsidian forms when water flows over lava, so you can create your own obsidian by pouring water over a lava pool, but you’ll need a diamond pickaxe to mine it without it breaking instantly.
3. How to Craft Your First Full Diamond Armor Set
Diamond gear is the standard mid-game upgrade for most Minecraft players, and crafting your first full set of diamond armor and tools is a major milestone. Before you start mining for diamond, you’ll need to gather the right tools and find the right level.
Diamonds spawn exclusively in the Nether and in the Overworld between Y-levels -58 and -64, according to the latest 1.21 update changes. You’ll need an iron pickaxe or better to mine diamond ore, and you should bring plenty of torches to light your mine so you don’t fall into lava or get ambushed by mobs. A full inventory of iron pickaxes is also a good idea, since diamond ore will break most pickaxes after a few uses.
Once you’ve collected at least 24 diamond ores, smelt them into diamond ingots in your furnace. You’ll need 5 ingots for a full set of armor (1 for the helmet, 3 for the chestplate, 1 for the leggings, and 1 for the boots) and 3 ingots for a diamond pickaxe, plus extra ingots for a sword, shovel, and axe. Most players save extra diamond ingots to craft an enchantment table, which lets you add special bonuses to your gear like fire protection or unbreaking.
Enchanting your diamond gear will make it last far longer and give you huge advantages in combat. You’ll need lapis lazuli, which spawns at Y-levels -32 to -64, to use as a crafting material for enchanting. You can also combine enchanted books with your gear using an anvil to add specific enchantments without spending lapis lazuli every time.
4. How to Build a Functional Survival Base
A good survival base will keep you safe, store your resources, and let you automate many of Minecraft’s most tedious tasks. The best starting bases are small, compact, and easy to defend, with separate areas for farming, smelting, and storage.
Start by choosing a flat, open location near water and a forest so you have easy access to resources. Avoid building in open plains or desert biomes, since you’ll have no cover from mobs at night. A mountain base or a base built into a hill is ideal, since it’s already partially protected from attacks and you can mine directly into the mountain for extra resources.
Your base should have at least four key rooms: a storage room with chests for all your resources, a smelting room with multiple furnaces, a farm room with wheat, carrots, and potatoes, and a bedroom with multiple beds so you can skip the night with friends. You can also add a enchanting room, a brewing stand for potions, and a Nether Portal once you’re ready to explore the Nether.
Automating your base will save you hours of manual work. You can build a automatic crop farm using water streams and hoppers to collect wheat automatically, a automatic smelting system using a furnace minecart and a hopper to feed fuel and ore into the furnace, and a automatic sheep shearing system using dispensers and redstone. Redstone is Minecraft’s in-game circuitry system, and learning the basics will let you build almost any automated device you can imagine.
5. How to Explore the Nether Safely
The Nether is a fiery, dangerous dimension filled with rare resources like netherite, blaze rods, and glowstone, but it’s also home to some of Minecraft’s most powerful mobs like ghasts, blaze, and piglin brutes. Before you enter the Nether, you’ll need to prepare thoroughly.
First, build a Nether Portal using 14 obsidian blocks arranged in a 4x5 frame, then light the inside of the portal with flint and steel. You should bring at least a full set of diamond armor, a diamond sword, a diamond pickaxe, and plenty of food, potions, and blocks to build a temporary shelter inside the Nether. You should also bring a bucket of water to put out fire, since the Nether is filled with lava and fire damage.
Once you’re inside the Nether, your first goal is to find a bastion remnant or a nether fortress, which are the two main structures in the dimension. Bastions are home to piglins, who will trade you gold ingots for rare items like netherite scraps and pearls, while nether fortresses are home to blazes, who drop blaze rods needed to make brewing stand and eyes of ender.
Netherite is the strongest material in Minecraft, and you’ll need it to upgrade your diamond gear to netherite gear, which will give you extra durability and fire resistance. You’ll find netherite scrap in ancient debris, which spawns in the Nether at Y-levels 8 to 22. You’ll need a diamond pickaxe with the silk touch enchantment to mine ancient debris without breaking it, then smelt it into netherite ingots in a furnace.
6. How to Defeat the Ender Dragon and Beat the Game
The Ender Dragon is the final boss of Minecraft, and defeating her will let you "beat" the game, though most players continue exploring and building after the victory cutscene. Before you fight the Ender Dragon, you’ll need to prepare for a long, difficult battle.
First, you’ll need to collect 12 eyes of ender, which are crafted with 1 blaze rod and 1 pearl. Eyes of ender will let you find the stronghold, a underground structure that houses the End Portal, which will take you to the End dimension where the Ender Dragon lives. You’ll need to right-click eyes of ender to follow their path until they point straight down, then dig down until you find the stronghold.
Once you’ve found the End Portal, place 12 eyes of ender in the portal frames to activate it, then step inside to enter the End dimension. The End is a floating, empty dimension with a single obsidian platform where you’ll spawn, and the Ender Dragon will fly overhead immediately to attack you.
The key to defeating the Ender Dragon is destroying the end crystals that heal her, which are placed on top of obsidian pillars around the dimension. You’ll need to use a bow and arrow to shoot the end crystals, or use a diamond sword to destroy them up close. Once all the end crystals are destroyed, the Ender Dragon will no longer heal, and you can attack her directly with your sword or bow.
Most players bring plenty of golden apples, potions of strength and fire resistance, and a bridge made of blocks to reach the end crystals. You should also bring a bed, which will explode when used in the End dimension, dealing massive damage to the Ender Dragon and any nearby mobs. Once you’ve defeated the Ender Dragon, you’ll see a cutscene showing you the end of the game, and you’ll be able to return to the Overworld whenever you want.
7. How to Breed and Raise Animals for Renewable Resources
One of the best parts of Minecraft is building a self-sustaining farm for animals, which will give you a endless supply of food, wool, leather, and other resources. Breeding animals is simple once you learn the right food for each species, and it’s a great way to build a large herd without having to hunt for every animal.
Each animal has a specific food item that will make them enter love mode, where they’ll mate and produce a baby animal. For example, wheat will breed cows, sheep, and pigs, while carrots will breed rabbits and potatoes will breed chickens. You’ll need two adult animals of the same species to breed them, and the baby animal will take a few minutes to grow into an adult.
You can build a animal pen using fences and gates to keep your animals contained, and add water troughs to make sure they have access to water. You can also automate your animal farm using hoppers and dispensers to feed the animals automatically, so you don’t have to hand-feed every animal every time.
Sheep are a great starting animal for new players, since you can shear them for wool without killing them, and they’ll regrow their wool after a few minutes. Cows and pigs will drop meat when killed, so you’ll need to breed them regularly to keep your supply of food steady. Chickens will drop feathers, which are used to make arrows, and eggs, which can be used to make cake or breed more chickens.
8. How to Use Redstone to Build Automated Machines
Redstone is Minecraft’s in-game circuitry system, and it lets you build everything from simple doors to fully automatic factories. Learning the basics of redstone will save you hours of manual work, and it’s a fun challenge for players who want to take their Minecraft builds to the next level.
The core components of redstone are redstone dust, which carries power, redstone repeaters, which extend the range of redstone signals and delay them, and redstone comparators, which compare two signals and output a stronger or weaker signal. You’ll also need levers, buttons, and pressure plates to activate redstone devices, and pistons and slime blocks to move blocks and create moving machines.
Some of the easiest redstone builds for new players include a automatic door, a hidden chest, and a crop farm. An automatic door uses a pressure plate to activate a redstone signal, which pushes pistons to open and close the door. A hidden chest uses a piston to hide a chest behind a wall, so only you can access it. A automatic crop farm uses water streams to push crops into a hopper, which collects the crops and stores them in a chest.
More advanced redstone builds include a automatic smelting system, a mob farm, and a computer inside Minecraft. A mob farm uses a dark room and water streams to collect mobs, then uses a cactus or lava to kill them and drop their loot, which is collected by hoppers and stored in a chest. A computer inside Minecraft uses redstone, displays, and keyboards to let you play games or run programs inside the game itself.
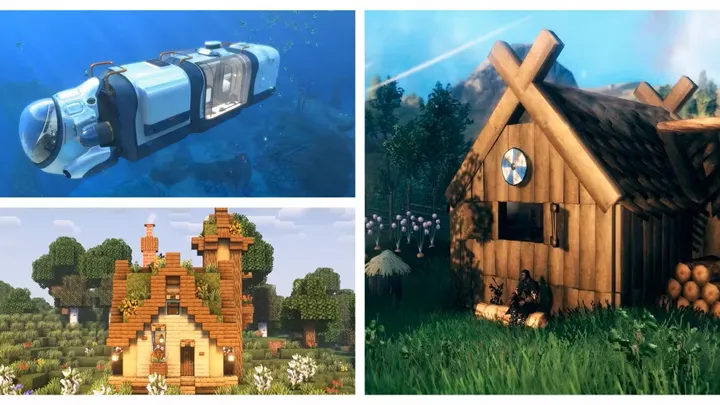
9. How to Build a Beautiful Base Without Using Cheats
Many players want to build beautiful, elaborate bases without using Creative mode or cheats, and there are plenty of tips and tricks to make your builds look professional and polished. The key to good building is planning ahead, using the right blocks, and adding details that make your base feel lived-in.
First, choose a theme for your base: you can build a medieval castle, a modern skyscraper, a underwater base, or a treehouse. Having a clear theme will help you choose the right blocks and avoid mixing different styles that look messy. For example, a medieval castle should use cobblestone, stone bricks, and oak wood, while a modern skyscraper should use glass, concrete, and quartz.
Next, add details that make your base feel functional and lived-in. Add torches and lanterns to light your base, add furniture like tables, chairs, and beds, and add landscaping around your base like gardens, paths, and fences. You can also add hidden rooms and secret passages to make your base more interesting, and use terraforming to shape the land around your base so it fits naturally into the environment.
One common mistake new builders make is using too many different blocks, which can make your base look cluttered. Stick to 2 to 3 main blocks for your base, and use accent blocks to add pops of color and detail. For example, you can use oak wood as your main building material, and use dark oak wood and stone bricks as accent blocks to add contrast.
You can also use commands to help you build, like /fill to replace large areas of blocks quickly, or /clone to copy and paste parts of your base. However, you should avoid using commands to build your entire base, since part of the fun of Minecraft is building something with your own two hands.
10. How to Play Minecraft with Friends and Join a Community
Minecraft is far more fun when played with friends, and there are plenty of ways to play with other players online or in person. You can join a public server, create your own private server, or play on a local network with friends who are in the same room as you.
To play with friends on a public server, you’ll need to find a server that matches your playstyle: there are survival servers, creative servers, minigame servers, and roleplay servers. You can find servers by searching on Minecraft’s official server list, or by looking for communities on Reddit, Discord, or YouTube. Most public servers have rules against cheating and griefing, so you’ll need to follow the server’s rules to avoid being banned.
To create your own private server, you’ll need to download the Minecraft server software from the official Minecraft website, and set it up on a computer or a hosting service. You can invite your friends to join your server by sharing your server’s IP address, and you can install plugins to add extra features like economy systems, mini-games, and anti-griefing protections.
Playing with friends is a great way to learn new skills and try new things in Minecraft. You can split up tasks: one friend can mine for resources, another can build the base, and another can explore the Nether. You can also work together to build large projects like a giant castle or a working roller coaster inside Minecraft.
The Minecraft community is one of the largest and most active in the video game industry, with millions of players creating custom maps, mods, and skins every day. You can join communities on Discord, Reddit, and YouTube to share your builds, ask for advice, and collaborate with other players.
Final Thoughts on Mastering Minecraft
Minecraft is a game that rewards patience, creativity, and practice, and there’s always something new to learn no matter how long you’ve been playing. Whether you’re just starting out or you’re a veteran player looking to try something new, this guide will help you build the skills you need to thrive in every aspect of the game.
Remember, the most important part of Minecraft is having fun: don’t stress out if you die a lot, or if your first base is messy, or if you can’t beat the Ender Dragon on your first try. Every player starts as a new player, and every mistake is a chance to learn something new.
If you’re looking for more tips and tricks, check out the official Minecraft wiki, which has detailed information on every aspect of the game, or follow Minecraft content creators on YouTube and Twitch for tutorials, challenge videos, and let’s plays.